Wednesday, January 22, 2014

Frozen Printable

I designed my own invitation for my baby's party. I first created a 4.5 X 6.5 invitation and then mounted it on 5x7 cardstock. I added a snowflake ribbon detail as well.

Since I love you all so much, I made a printable version for all of you to use. They will print 4.5x6.5 just fill them out. Or if you want to get fancy, paste the JPEG in Word and you can create text boxes to add your text. Just right click and save.

Until next time,

Nicole

Monday, January 20, 2014

Frozen Party

Hi friends. I know it has been a while. I got caught up with Christmas and then my little one's first birthday. Usually I have a massive celebration for birthdays but this year we decided to change things up. We had a very small low key gathering with about 10 adults and 6 kids. We really wanted to celebrate the child with out the stress for us and overwhelming feelings for her. My second child is far more introverted than my first and gets overwhelmed with noise and too many people.

Since Frozen is a new movie, not too many ready made items are available. So, I had to come up with my own. I started with my dessert display. I picked up a fabric panel from Etsy. I mounted it on a foam board to use as my back drop. The "One" letters were on sale fr $1.50 each at Hobby Lobby. I stuck them in various milk glass containers and added uncooked rice. I figured this was easier than mounting on wood because I want to reuse the letters for other words (think NOEL).
I made my own pennant banner with fabric to match Anna's dress. The Frozen fabric is from Joanne's.


The buffet included blueberry yogurt pretzels, dipped Madeleines, dipped Oreos and Twinkies (just because). The framed paper doll photos are from a very talented person, Cory. She generously shares her paper dolls on Facebook and lets us print them for free. The frames are in the $2 bin at Michael's


 Party favors are Martha Stewart snowflake favor boxes with free printable tags found here : http://www.weeshare.net/2013/12/frozen-toys-frozen-kids-meals-and-free-printable-frozen-gift-tags.html

No party is complete without a pinata.
 Last but not least is the cake. There were no ready made cakes with Frozen. I bought the figurines from the Disney Store. The cake was a marble cake with custard and banana filling and a whipped cream icing from ALBERTSON's. It is really tasty. I highly recommend it.

You can check out some of my other ideas on my Frozen Pinterest board. http://www.pinterest.com/31wifefolife/frozen/
 Until next time friends.

Nicole

Monday, December 16, 2013

Steel Cut Oats- Jamba Juice Copy Cat

So I was telling you all how much I love steel cut oatmeal. Today, I have your recipe for the yummiest oatmeal ever. Please remember you must buy STEEL CUT the quick oats and old fashioned oats will not give you the same results. If you buy the wrong stuff you will have a warm oatmeal smoothie. 

Quaker makes some in a blue container but I have had luck at Trader Joe's. It is more expensive than the "regular" oatmeal but so much tastier and a texture that your mouth will just not believe. For those of you who have had the Jamba Juice oatmeal, you know what I am talking about. You could do a Christmas morning oatmeal bar. A perfect bowl of oatmeal on a cold Christmas morning. Just remember when cooking, it expands like rice.

Enjoy. Until next time,
Nicole

Steel Cut Oatmeal

2 cups steel cut  (NOT Quick Oats!)
8 cups Vanilla Soy Milk


Toppings

banannas & brown sugar
dried fruit
pecans
rasins
nuts
cranberries
blueberries


Combine all in slowcooker and cook on low for 8 hours. Alternative method : cook in the rice cooker in porridge mode or regular. Stir in more soy milk to your liking and top with your favorite toppings. If you prefer plain, just top with some brown sugar.


Wednesday, December 11, 2013

The Perfect Christmas Tree

Photo: South Coast Plaza tree
Many of you are overachievers when it comes to Christmas decorating. Some of you are already done but I have not even started my Christmas tree. Lucky for us, we have a professional Christmas decorator giving us some tips. May I please introduce Sophia Mirasol with her handy Christmas tree decorating tips.

Christmas has to be my favorite time of the year. Amidst the hustle and bustle, I find a moment of peace when I sit beside the Christmas tree. It is a joy when my boys sit with me and discuss which is their favorite decoration on the tree.
Here are some tips that will make holiday decorating as simple as pie. . .
1. Start with a thick pre-lit tree. One that has mixed leaf textures and wired pine cones is even better.
2. If it is not a pre-assembled (fold up) type, arrange all the layers in ascending order.
3. Use the pointed plastic attachment of your vacuum cleaner and vacuum your tree.
4. Assemble and fluff all leaves pointing upward and up. This will make it easy to balance any decoration you will hang.
5. Add fancy lights to match your theme. I love star lights or icicle shaped lights. You can scatter them or bunch them for greater impact. Add your lit tree top. Always use proper extension cords and plug them into an AVR or fused outlet strip.
6. Add vines or leaves. Then add berries or a second color of leaves. Play with a coordinated pallette for a playful look or go a range of mono chromatic for a more elegant look.
7. Add Christmas flowers. Poinsettias are the most popular but you can use any flower. Remember that the flowers must be in proportion to the size of the tree. The larger the tree, the larger the flowers.
8. Add your most special ornaments first to be able to position them in the most noticed places. Add different shaped balls, snow flakes, gilded pine cones. You can work these in inner portions of the tree. Secure your ornaments with green florist wire.
9. Add your ribbon and bead garland. Secure with green florist wire.
In between every step, step back and check from various angles of the room for balance and symmetry of your work.


A typical 7 foot tree will use a minimum the following...
10 sets of lights
12 vines or branch picks
12 berry picks
12 flowers
48 balls
24 special ornaments


At the end of the season, make sure to clean decorations and remove all wires. Store glass ornaments in acid free containers. Take photos and list the items in each container. Do not keep broken ornaments. This will make it easy for you the next year.

--Sophia Mirasol

For those of you lucky enough to be in Metro Manila, Sophia is available for your Christmas decoration needs.

Decorate away my friends, decorate away. Until next time.

Nicole

Wednesday, December 4, 2013

Yellow & Grey Elephant Baby Shower Brunch

Hi friends. I sure missed blogging for you all. Here is a shower I did during my move week. So awesome ladies at church helped to it together with me to bless the mommy to be and her blessings.

So here is a yellow and grey baby shower that we threw for TWINS.  Please note all I had was my camera phone, so the pictures are far from professional.

The cupcakes were topped with Cricut elephant toppers. I covered a large foam board with yellow fabric and made paper rosettes like I did for my Man's Party (http://31wifefolife.blogspot.com/search/label/man%20party)
 The elephant stuffies were hand made by a friend of mine who does craft fairs. She is so talented that she does not even use a pattern to make them.
 A gluten free chocolate cake graced the table with a large elephant topper.

 The brunch menu included quiche and a make your own parfait bar. We used 6 oz. baby food jars as parfait containers.

 We also had a steel cut oats bar. The recipe I have is exactly like the Jamba Juice oatmeal. I will share that for you later this week.  We also had a waffle bar (but I have no pictures) off to the side with a waffle maker and batter for the guests to pour and make waffles.


 Last but not least the favors. We got cute yellow boxes from Dollar Tree and Hand Sanitizer.  I used free printables from Pottery Barn kids (http://www.potterybarnkids.com/design-studio/invitations/sunshine_templates.html). You can check out my Pinterest board for my thought process in planning this shower (http://www.pinterest.com/31wifefolife/twin-baby-shower/)

Until next time friends.

Nicole

Monday, October 28, 2013

Pimp My Cozy Coupe: Top 10 Ideas

Hi friends. I realize that Christmas is right around the corner because I am starting to see the Christmas decorations and publications of the "hot" toy list. However, my favorite toys to purchase are the classics. Today, we will explore the Cozy Coupe, a true classic. Except today, we are going to explore ways to revamp and take the old, used, and Craigslist disasters and pimp 'em just in time for Christmas. Here is my Top 10 Pimp My Cozy Coupe Ideas. So, start searching for them janky Cozy Coupes to pimp out for your little ones. Or take the boy one you have and make it girl friendly and the girl one and make it boy friendly. A little paint and imagination goes a long way. 

 10- Volkswagen Lady bug. Source: Pinterest

 9: Woody's Pimp Ride. Source: Pinterest
 8:Minion Mobile
 7: Minnie Mouse Motor Car. Check out the details at:  http://supermessysupermommy.blogspot.com/2012/09/averys-birthday-party-recap.html
 6: The Herbie Heap for the Mama's and Papa's who remember elementary school and the Herbie movies. Source: Pinterest
 5: The Ice Cream Buggy. Check out the deets at http://www.dwellingsbydevore.com/2013/06/cozy-coupe-makeover.html#.UmXjS_lQHTp
 4: Fire Truck. See the how to at http://www.sweetcsdesigns.com/cozy-coupe-fire-truck/.
 3: Batmobile. Check out : http://nikkisnacs.blogspot.com/2013/02/henry-turns-3.html
 2: Dukes of Hazzard. Classic just like the car. Source: Pinterest
 1- The Super Pimped out Echto-1. Source:chickslovethecar.com


You can see these and the other Pimp My Cozy Coupe ideas I have on my Pinterest board: http://www.pinterest.com/31wifefolife/pimp-my-cozy-coupe//

Happy pimping. Until next time,


Nicole

Wednesday, October 23, 2013

A $64 Dollar Desk


Hi Friends. I wanted to show you today how I restored an antique desk.


The desk style I liked was the Whitney desk from Pottery Barn. But seriously? $999 for a desk? Me thinks NOT.


Here is another one at ONLY $949 plus tax.

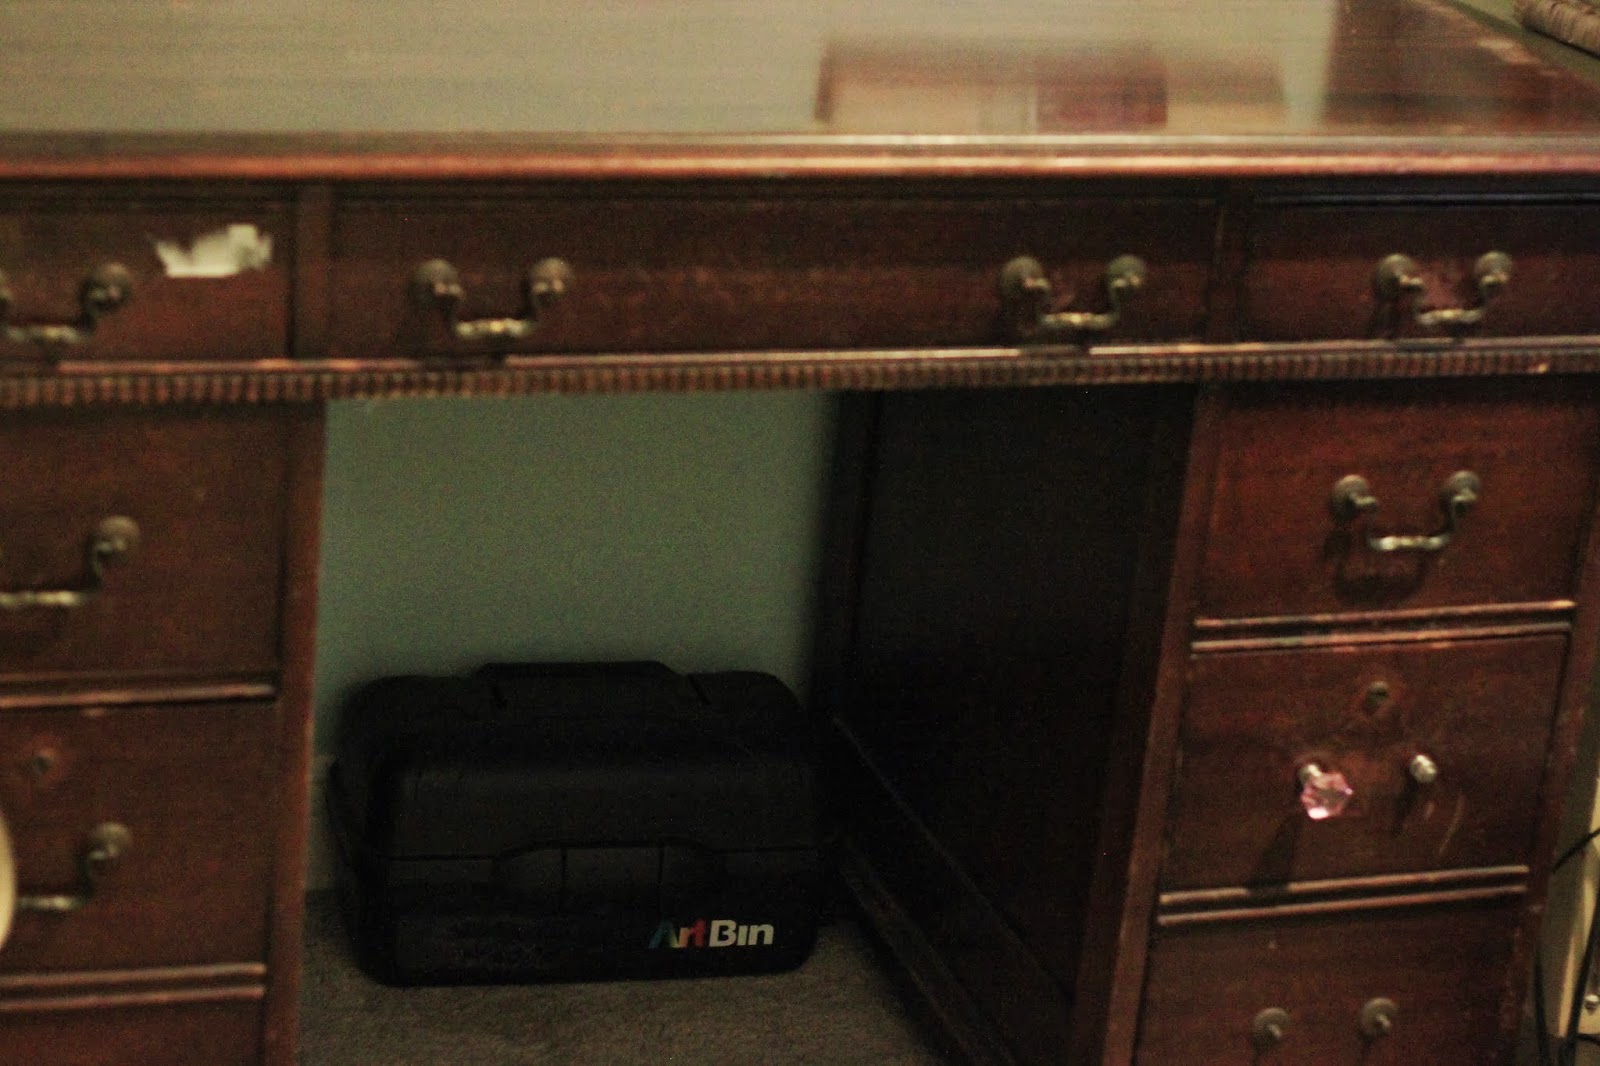
Enter the Craigslist disaster. For $35 I got antique, missing pulls, scratched, and even stickers.


Here are some close ups:

scratches and dings


Look at those scratches on the top.

Talk about your fixer upper. This thing looked like it was in need of stripping to restore.The saving grace is that it is sturdy with good bones. Confession: I used this for the past two years in this condition. How unsexy. In our new home, this will be the man's desk. I want him to be able to use a nice desk when he works from home. We need to bring sexy back to this desk.


Solution: A trip to Home Depot for Restor-A-Finish ($8.98) and staining pads ($3.98).


I followed the directions on the bottle and purchased new pulls from Ebay ($15 with shipping). Make sure you measure ALL the pulls' distance to center. This baby was at 2.5 inches for the top pulls and 3 inches for the bottom. 

Look at the top, it removed those scratches. Best of all, this took me under an hour to restore. Really amazing stuff I tell you. 


Ta-da! the after, bringing sexy back! Don'tcha wish your desk were hot like mine?! Restor-A-Finish people. If any of you restore any old desks, please show me. I will do a round up of all your desk projects.

Here is the comparison:
BEFORE:
 AFTER:


Total Cost:
Desk                        $35
Restor-A_Finish         8.98
Staining Pads              3.98
Tax                             1.04
Ebay knobs                 15

Total                           $64
Pottery Barn Desk  $999 plus tax

A total savings of  $935 (plus tax)

Until next time friends.

Nicole